
ODM/OEM Product Customization

Spatial Solutions Design

Global Furniture Distribution Network


1. Why Choose AOKE Ergonomic Products?
① Fully Customizable
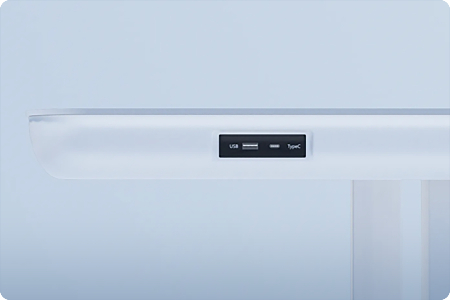
AOKE excels in meticulous customization. From product dimensions and structural design to color schemes, we offer comprehensive personalization across all stages to precisely match your usage scenarios and aesthetic preferences.
② Exclusive Extended Warranty
All AOKE height-adjustable desks come with a “5+2” warranty service (five-year warranty on the desk frame / two-year warranty on the electric control system).
2. How to troubleshoot product malfunctions?
You may follow these steps to resolve the issue:
A: Self-Troubleshooting
Refer to the product manual or visit the AOKE official website: [Service Support] → [FAQ] → [Troubleshooting] to attempt a quick fix.
B: Contact Customer Service
If the issue persists, please reach out to us via the official customer service hotline or online chat. We will provide a solution promptly.
3. What features does the AOKE height-adjustable desk [Online 3D Configuration] offer?
Freely choose tabletop colors, tube styles, and leg combinations
Customize accessory selections to complete your personalized desk configuration
View product details with 360° panoramic previews
Submit your configuration request with one click—a dedicated customer service representative will contact you shortly
1. How do I set up the height memory function?
Depending on the number of memory keys for different specifications and models, the Desk Converters can store up to n memory points:
· Adjust the desktop to the target height
· Press the [S/M] function key → The digital display shows “S-” (flashing)
· Simultaneously press [1] to [n] to complete storing the memory height
2. How do I perform the initialization operation for the height-adjustable desk?
When the system malfunctions or the hand controller displays “RST,” initialize the height-adjustable desk:
a) Enter initialization mode
· Press and hold the “▼” button until the motor stops, then release
· Press and hold “▼” for 5 seconds to automatically enter initialization mode
3. Note: Must maintain pressure throughout; releasing will cancel initialization
b) Confirm completion
· A beep indicates successful initialization
3. How should I adjust the misalignment of the crossbeam holes caused by external factors?
· Measure the lengths of the two diagonals of the beam using a tape measure.
· Adjust the two diagonal lengths to be equal, and the hole positions will align.
4. How to address the frequent occurrence of error code E05 during the lifting process?
a) Installation Status Check
· Verify that the height-adjustable desk control box and hand controller are securely fastened to the tabletop
(If the control box remains tilted, it will continue to trigger false E05 errors during subsequent height adjustments)
1. How to Troubleshoot Common Issues with Height-Adjustable Desks?
Please select the corresponding solution based on your product type:
I. Dual-Motor Products
1. How to resolve shaking after installing a dual-motor height-adjustable desk?
Check the installation status of key components:
① Verify that screws securing the motor housing to the crossbeam are tightened
② Verify that screws connecting the center of the crossbeam to the movable rod are tightened
II. Single-Motor Products
1. Uneven legs after reset in single-motor products
Scenario ①: Auxiliary leg assembled higher than main leg
Steps:
· Remove auxiliary leg
· Manually push to lowest mechanical limit
· Reinstall traditional rod
Scenario ②: Main leg pre-elevated
Steps:
· Completely remove traditional rod
· Lower main leg to lowest position, then reinstall following steps
2. Abnormal Noise from Drive Shaft in Single-Motor Products
This issue occurs due to friction between the drive rod and the motor housing. You can resolve it by pulling the drive rod outward slightly.
Note: If the above method fails to resolve the problem, please contact the Aoke customer service team!
3. Error Code Meanings and Handling Methods
| Error code | Instruction | Processing Method |
| E01 | Main power supply voltage exceeds 45V | Check the main power supply |
| E02 | The height deviation between the lead screws exceeds 1 cm | Reinitialize |
| E04 | Desk Converters connection or communication error | Inspect the hand controller cable |
| E05 | Obstruction Stop Display Display Stops When Blocked | Release the button and restart |
| E06 | Main power supply startup failed, voltage below 20V | Replace the main power supply, or check the main power supply connection cable |
| E07 | Protection when the main power supply is operating, below 20V | Power cycle |
| E08 | The desktop tilts when running. | Reinitialize |
| HOT | Power supply temperature is too high, or has been running for more than 2 minutes within the past 18 minutes | Wait for the power supply to cool down, or let the system rest for 18 minutes before restarting. |
| E11 | Motor 1 is not connected. | Check the wiring of Motor 1 |
| E12 | Motor 1 Current Sampling Channel Error | Replace the control board |
| E13 | Motor 1 has a phase loss; a phase wire is disconnected. | Check whether the motor's phase wires are connected incorrectly. |
| E14 | Motor 1 Hall sensor error, or Hall sensor wire disconnected | Check the Hall sensor signal, or replace the motor 1 connection cable. |
| E15 | Motor 1 Internal Short Circuit | Replace the motor |
| E16 | Motor 1 Locked Rotor | Reinitialize |
| E17 | Motor 1: Incorrect rotation direction | Swap the motor wires or Hall sensor wires |
| E18 | Motor 1: Overloaded due to excessive load. | Reduce load |
| E21 | Motor 2 is not connected. | Inspect the wiring connections for Motor 2 |
| E22 | Motor 2 Current Sampling Channel Error | Replace the control board |
| E23 | Motor 2 has a phase loss; a phase wire is disconnected. | Check whether the motor's phase wires are connected incorrectly. |
| E24 | Motor 2 Hall sensor error, or Hall sensor wire disconnected | Check the Hall sensor signal, or replace the motor 2 connection cable. |
| E25 | Motor 2 Internal Short Circuit | Replace the motor Replace the motor |
| E26 | Motor 2 Locked Rotor | Reinitialize |
| E27 | Motor 2 incorrect rotation direction | Swap the motor wires or Hall sensor wires |
| E28 | Motor 2 overload due to excessive load | Reduce load |
| E31 | Motor 3 Not Connected | Inspect the wiring connections for Motor 3. |
| E32 | Motor 3 Current Sampling Channel Error | Replace the control board |
| E33 | Motor 3 phase loss, phase wire disconnected | Check whether the motor's phase wires are connected incorrectly. |
| E34 | Motor 3 Hall sensor error, or Hall sensor wire disconnected | Check the Hall sensor signal, or replace the motor 3 connection cable. |
| E34 | Motor 3 Internal Short Circuit | Replace the motor |
| E36 | Motor 3 Locked Rotor | Reinitialize |
| E37 | Motor 3: Incorrect rotation direction | Swap the motor wires or Hall sensor wires |
| E38 | Motor 3 overload due to excessive load | Reduce load |
| E40 | The controller in the series connection has lost connection. | Inspect the connection cables between the main and auxiliary control boxes. |
| E41 | Serial signal error | Inspect the connection cables between the main and auxiliary control boxes, or replace the controller. |
| E42 | Memory error | Replace the controller |
| E43 | Obstruction Stop Sensor Error | Replace the controller |
| E91 | Motor 1, Motor 2, and Motor 3 are all disconnected. | Inspect the three connecting wires. |